Take your business to next level
Become part of our growing family of +600,000 users and get the tools you need to make smart choices for your website. Simple, powerful insights are just a click away.
Installing the WP Statistics plugin on your WordPress website is easy and similar to install any other plugins. You can do it in different ways. Here we will show you 3 ways of installing WP Statistics:
You can install and activate the plugin by searching it in the WordPress dashboard by following the below steps:
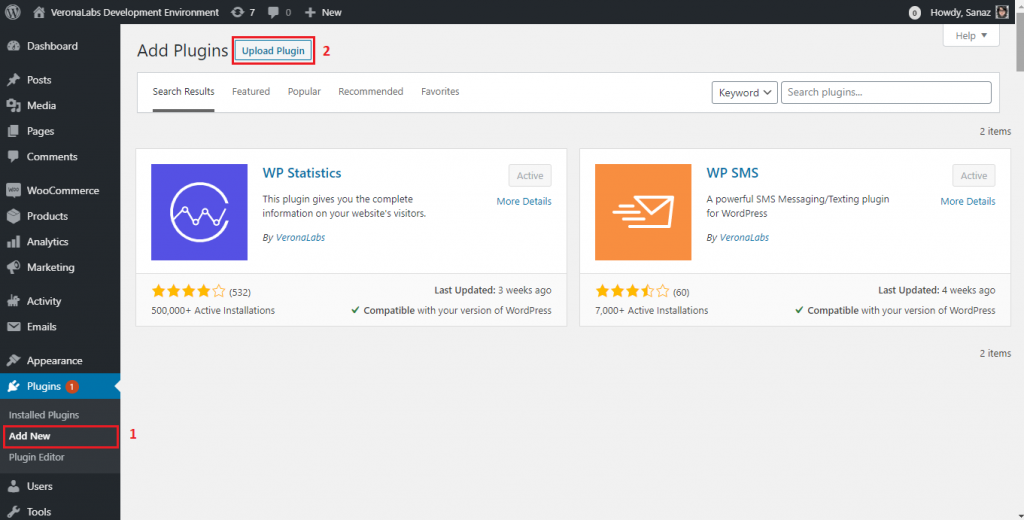
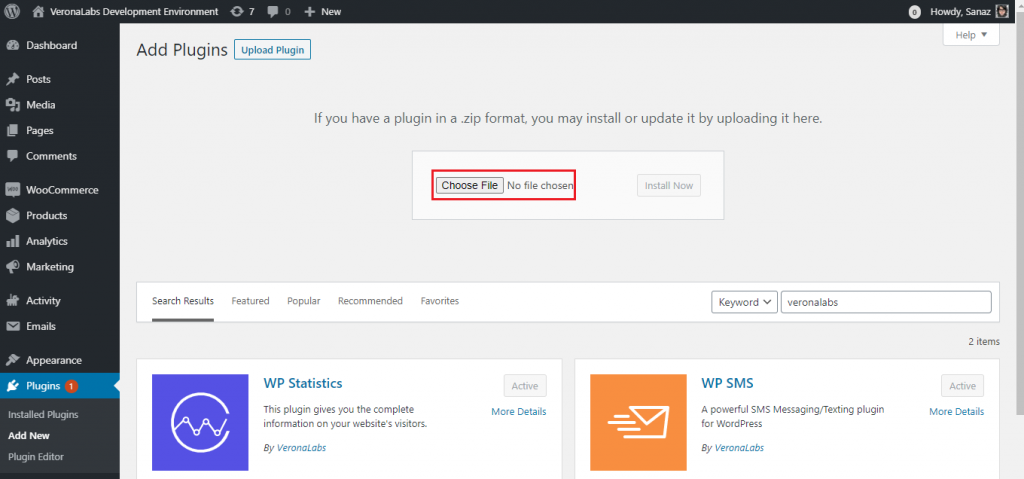
You can upload the file of WP Statistics directly to your WordPress website by following these steps:


The file will be installed on your WordPress website. Then you will see a success message after the installation is finished.
In the end, you should click on the Activate Plugin link to start using the add-on.
In this method, you can install WP Statistics by using an FTP client like Filezilla, FireFtp, and Cyberduck.
Become part of our growing family of +600,000 users and get the tools you need to make smart choices for your website. Simple, powerful insights are just a click away.