Documentation Guides How to Empty WP Statistics Tables

How to Empty WP Statistics Tables

WP Statistics stores all its data in your WordPress database, and over time, the amount of data can increase significantly. Since this data is stored directly on your server, you have complete control over it. If needed, you can manually delete this data to free up space without affecting the plugin’s functionality. In this guide, we’ll show you how to empty the WP Statistics tables to free up space while keeping the table structure intact.

Important Notes Before You Start

  • Backup Your Database: Before making any changes to your database, always take a complete backup. You can use plugins like UpdraftPlus or Duplicator to create a backup, or manually backup your database via phpMyAdmin.
  • Know Your Table Prefix: By default, WordPress database tables start with the prefix wp_. However, many users change this during installation for security reasons. In this article, we’ll refer to the table prefix as wp_, but make sure to replace it with your actual table prefix.

Step 1: Accessing Your WordPress Database

To empty the WP Statistics tables, you need to access your database. Here’s how:

  1. Log into your hosting control panel (cPanel) or any other hosting management system that provides access to the database.
  2. Find and open phpMyAdmin under the “Databases” section.
  3. In phpMyAdmin, select the WordPress database for your website from the list on the left.

Step 2: Identify the WP Statistics Tables

WP Statistics creates several database tables. These tables store all the data collected by the plugin. The tables usually start with your WordPress prefix followed by _statistics, such as:

wp_statistics_pages
wp_statistics_useronline
wp_statistics_visit
wp_statistics_visitor
wp_statistics_visitor_relationships

Make sure to replace wp_ with your actual database table prefix if it’s different.

Step 3: Truncate a Single WP Statistics Table

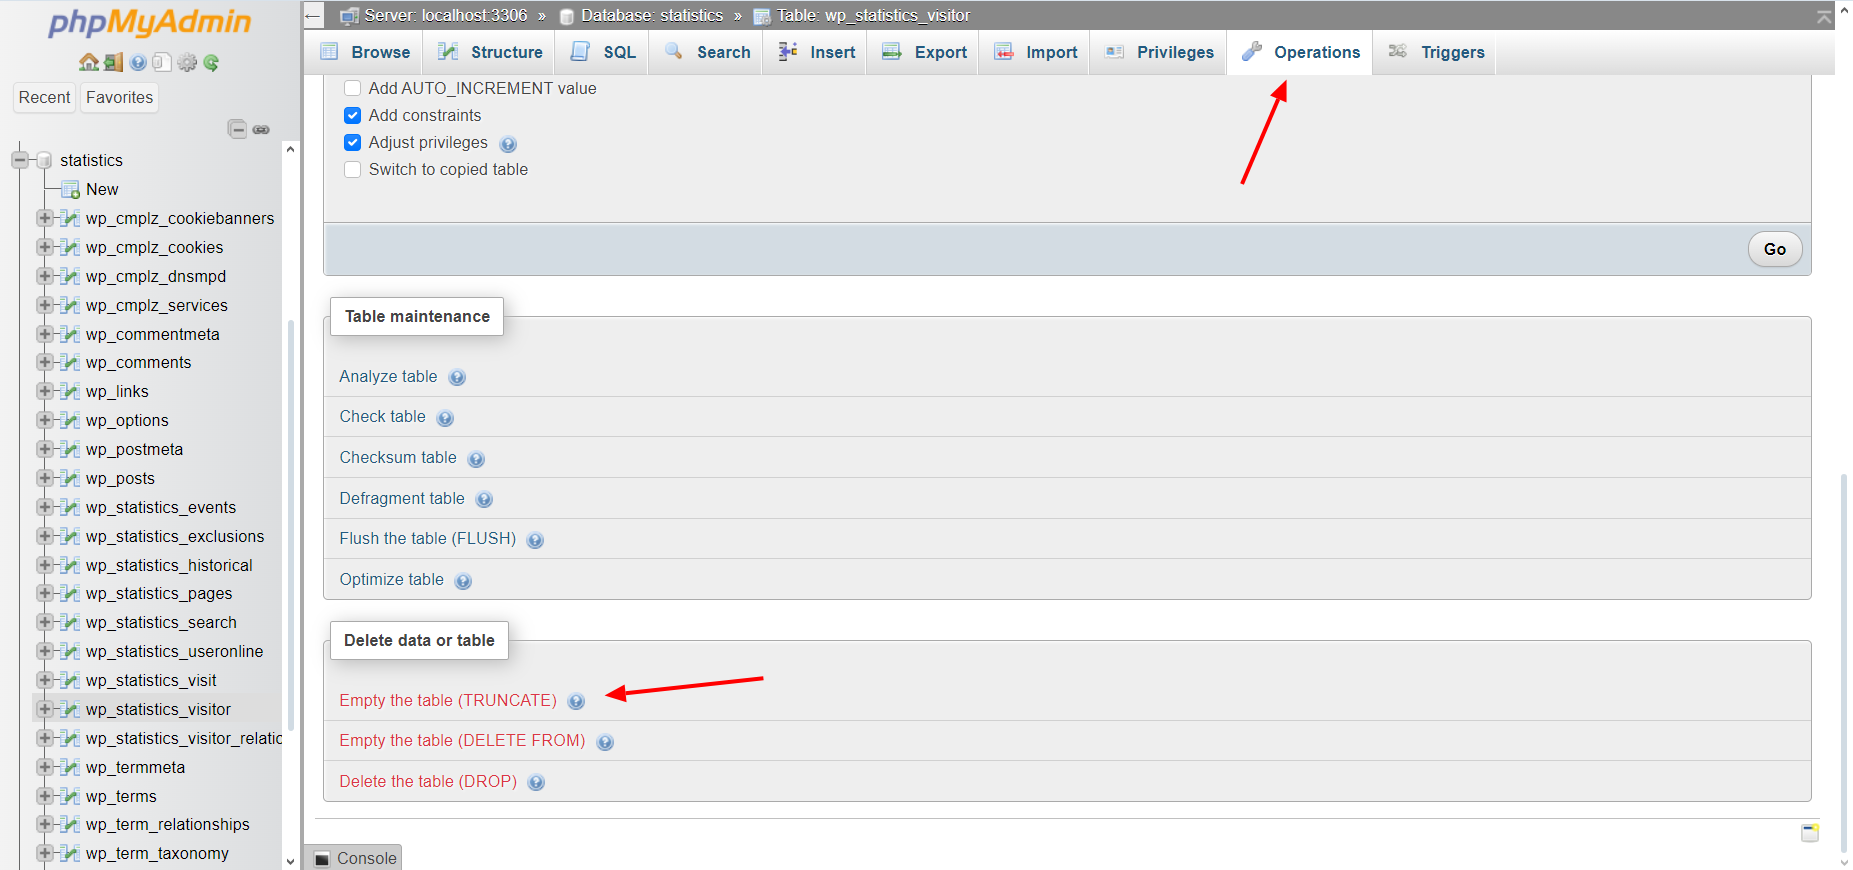
Truncating a table deletes all the data within it, while leaving the table structure intact. Follow these steps to truncate the WP Statistics tables:

  1. In phpMyAdmin, click on the first table you want to empty, such as wp_statistics_visit.
  2. Once the table is selected, click on the Operations tab at the top of the page.
  3. Scroll down to the section labeled Delete data or table.
  4. Click on Empty the table (TRUNCATE). This will instantly delete all data from the table but keep the table itself.
  5. Repeat the process for other WP Statistics tables like wp_statistics_pages, wp_statistics_visitor, and so on.

Note: Truncating a table is irreversible. All data within the table will be deleted permanently, so make sure you have backed up your database if you might need the data in the future.

WP Statistics Truncate Single Table

Step 4: Truncate Multiple WP Statistics Tables at Once

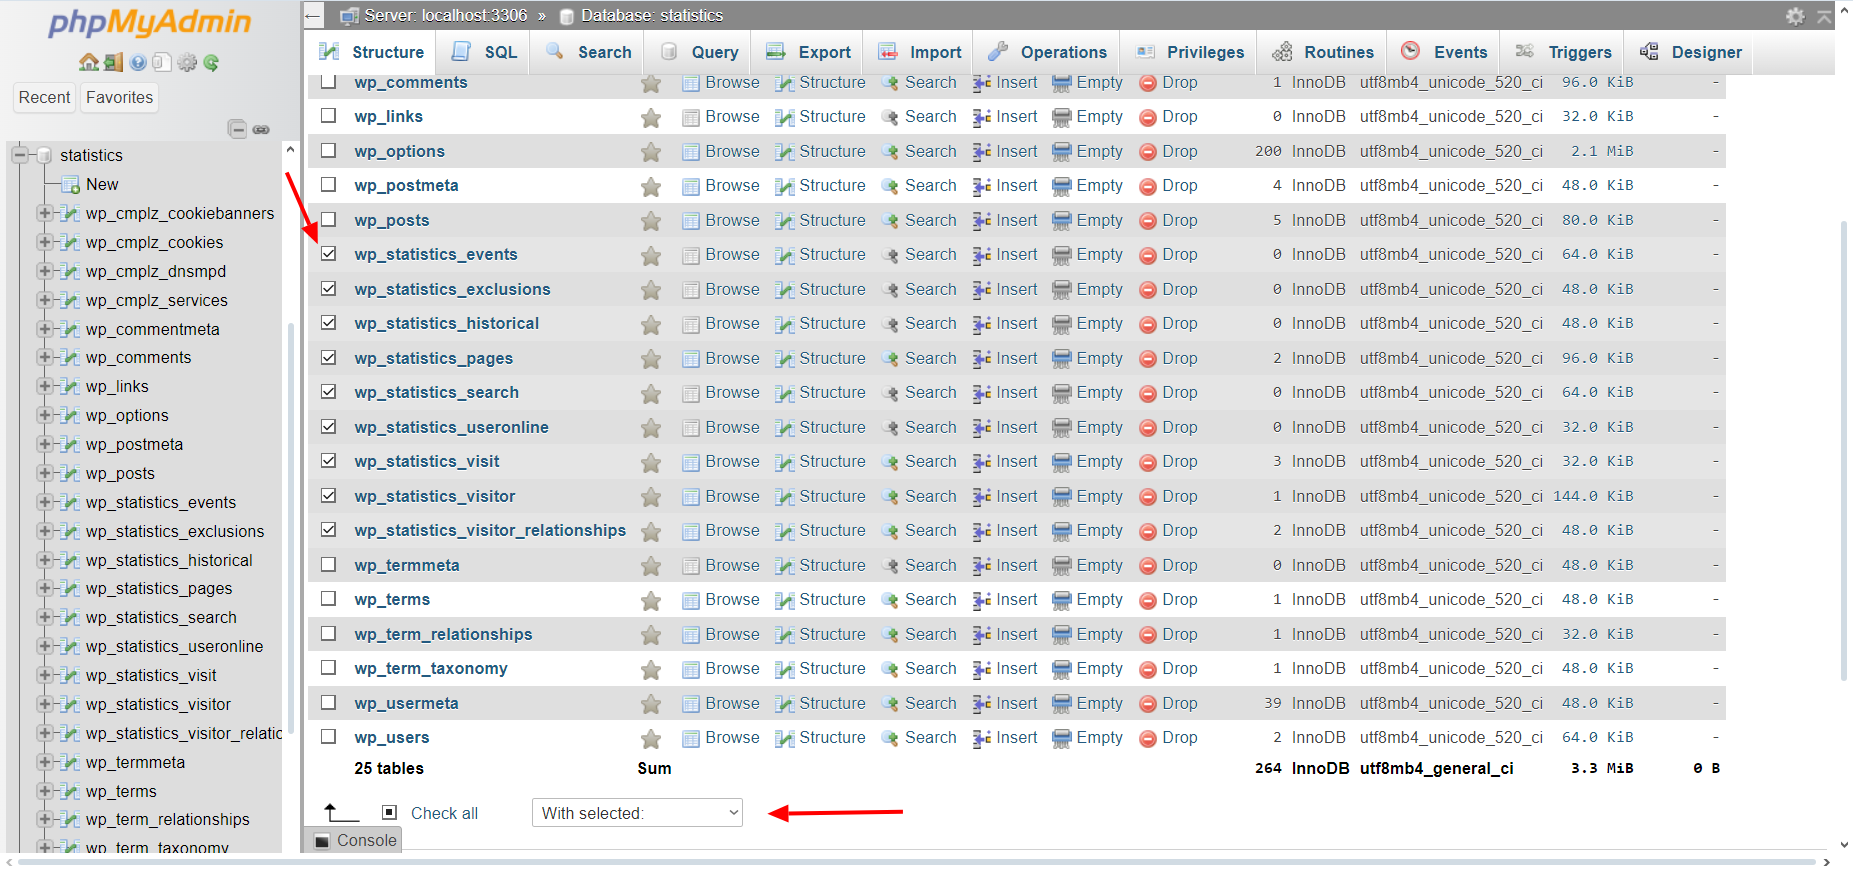
If you want to empty all the WP Statistics tables in one go, you can select and truncate them all together:

  1. In phpMyAdmin, navigate to your WordPress database and scroll down to find the WP Statistics tables. These tables typically start with wp_statistics_ (or your custom prefix).
  2. Check the box next to each WP Statistics table you want to empty. You can select multiple tables at once, such as wp_statistics_visit, wp_statistics_pages, wp_statistics_visitor, etc.
  3. At the bottom of the table list, open the dropdown menu labeled With selected and choose Empty.
  4. Click Go to confirm the truncation process. This will delete all data from the selected tables in one operation, saving you time.

Note: Truncating multiple tables at once is just as permanent as truncating a single table, so be sure to have a backup ready if needed.

WP Statistics Truncate Multiple Table

Step 5: Optimize the Database (Optional)

Once you’ve truncated the tables, it’s a good idea to optimize them to reclaim unused space and improve the database’s performance. To optimize the tables:

  1. In phpMyAdmin, go back to your list of database tables.
  2. Check the box next to each table you’ve truncated.
  3. At the bottom of the table list, select Optimize table from the dropdown menu.
  4. Click Go to optimize the tables.

Step 6: Set Up Automatic Cleanup (Optional)

To avoid accumulating large amounts of data in the future, you can configure WP Statistics to automatically delete old data after a set period. Here’s how:

  1. In your WordPress dashboard, go to WP Statistics – Settings.
  2. Click on the Advanced Options tab.
  3. Scroll down to the Purge Old Data Daily section.
  4. Enable Automatic Cleanup, and other data after a specified period (e.g., 30 days, 90 days, etc.).
  5. Save your settings.

This feature will help manage the size of your WP Statistics database tables and keep them from growing too large.

By following these steps, you can keep your site running smoothly and efficiently while still enjoying the benefits of WP Statistics.