Take your business to next level
Become part of our growing family of +600,000 users and get the tools you need to make smart choices for your website. Simple, powerful insights are just a click away.
Installing WP Statistics add-ons allows you to enhance the plugin’s functionality with powerful new features. This guide will take you through both manual and automatic methods to download, install, and activate add-ons on your WordPress website.
For a faster installation process, you can opt for the automatic installation method, which requires fewer manual steps. Here’s how:
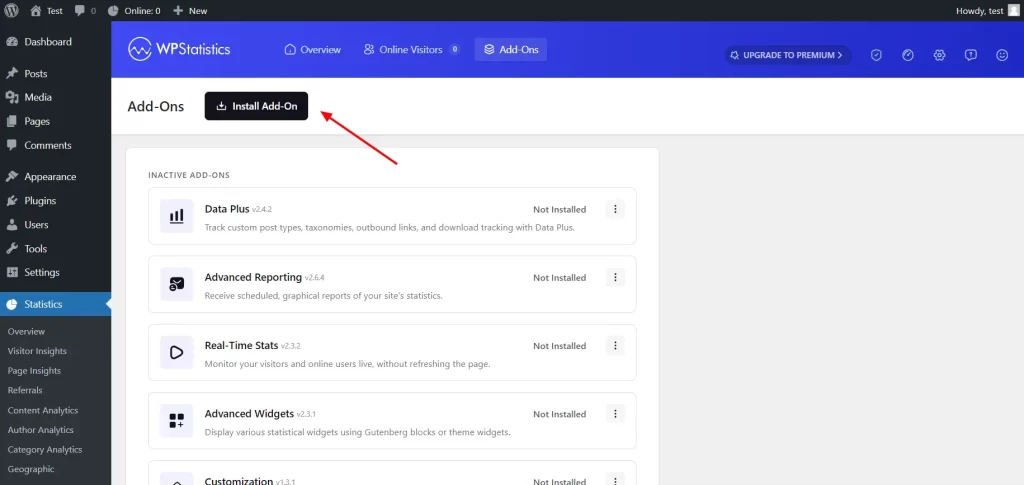
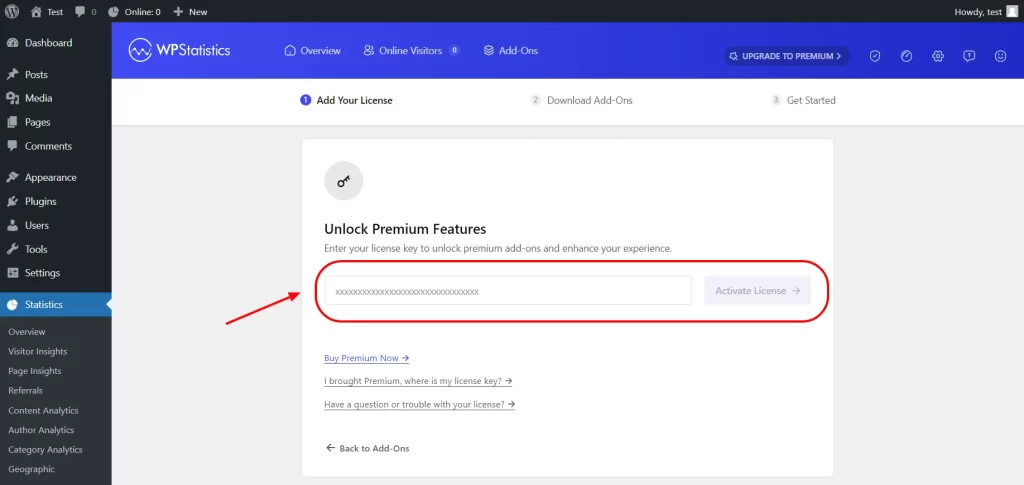
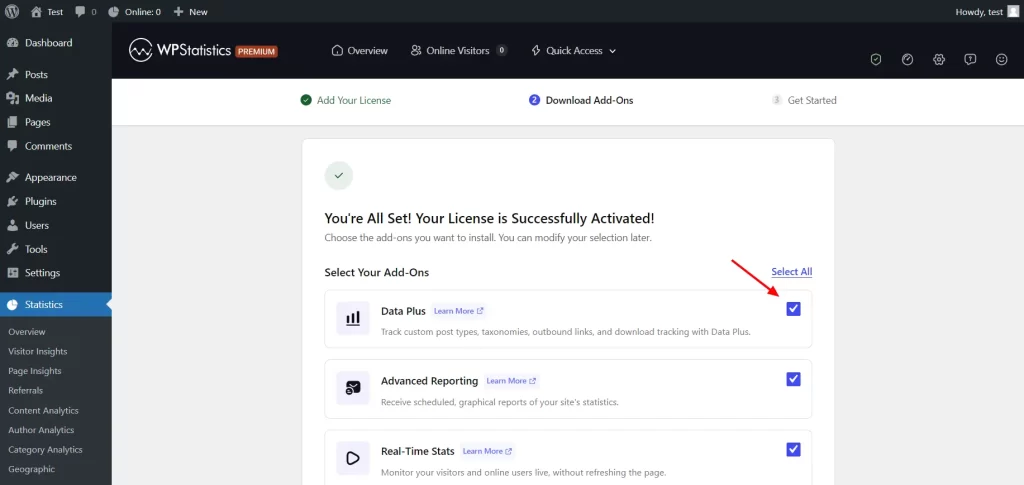
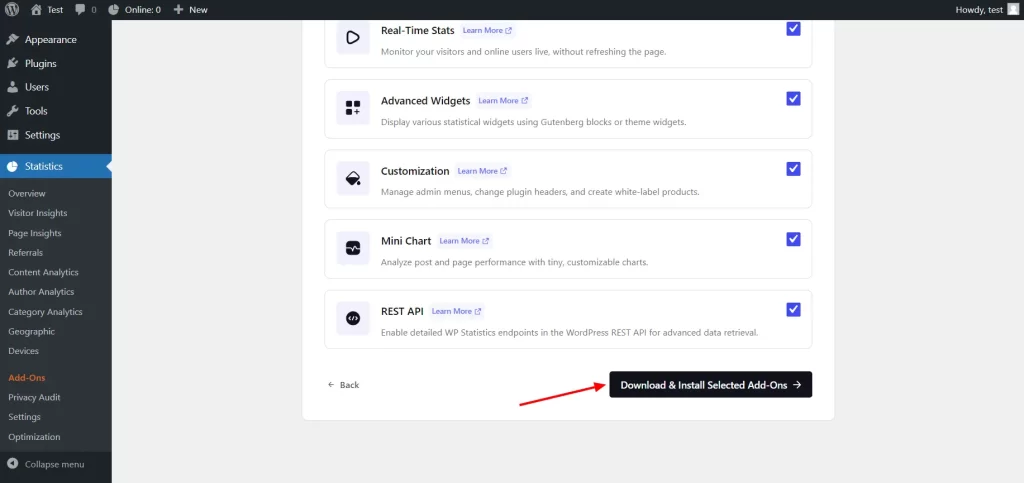
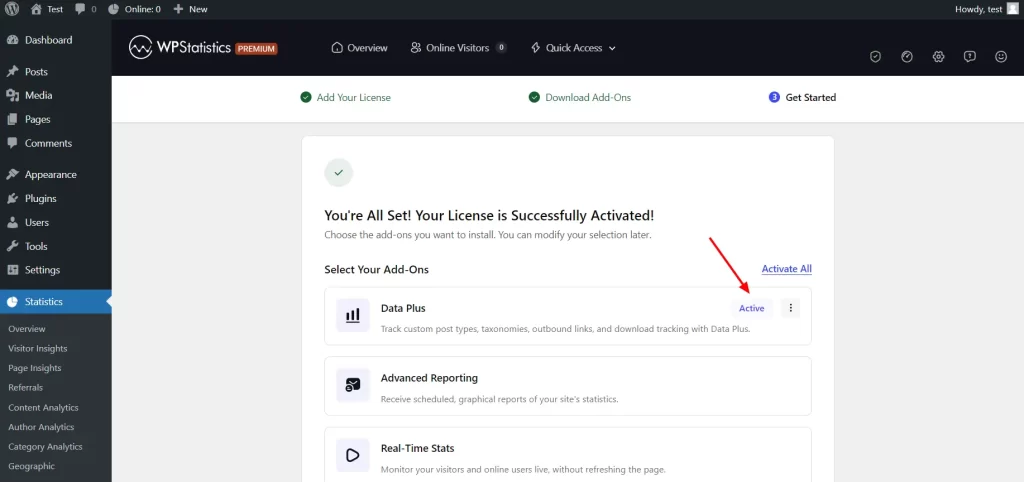
That’s it! The add-ons will be downloaded and installed automatically.
If you prefer to install the WP Statistics add-ons manually, follow these detailed steps:
To begin, download the add-on from your WP Statistics account:
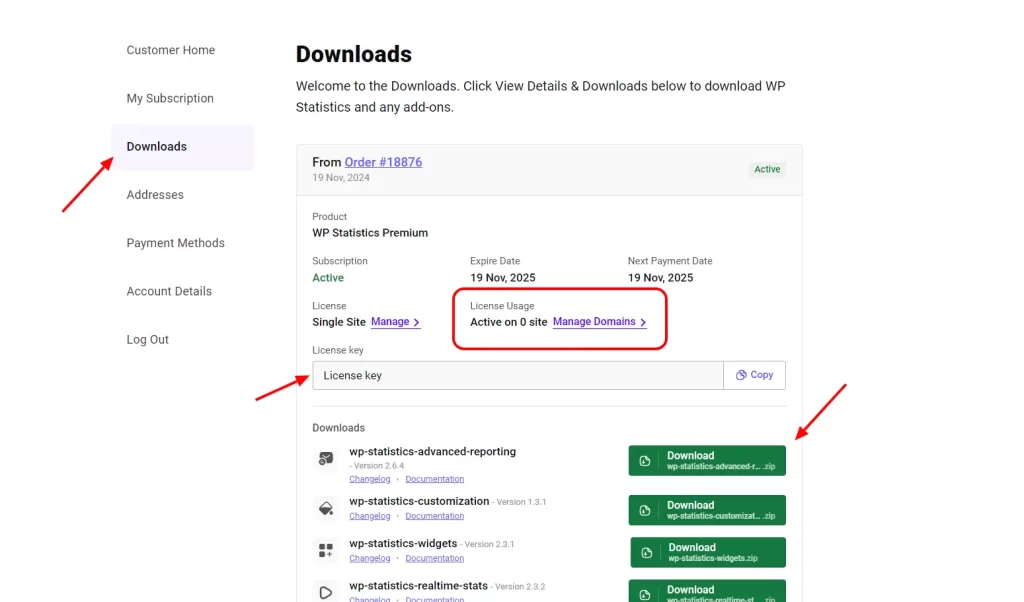
Note: Do not unzip the file, as it needs to be uploaded in its compressed form for installation.
Once you’ve downloaded the add-on, you’re ready to install it on your WordPress site. Before proceeding, ensure that your website meets the necessary system requirements.
Here’s how to install the add-on:
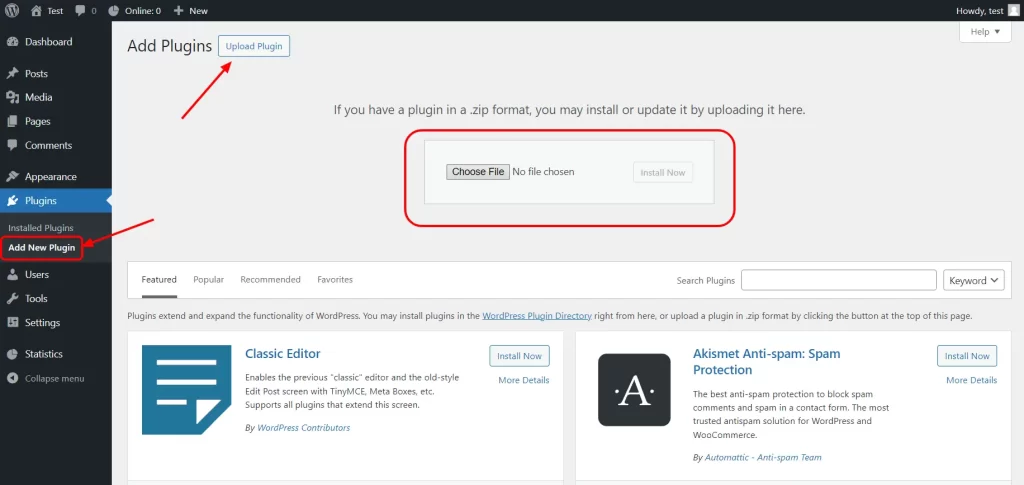
Alternatively, if you prefer using FTP, you can upload the unzipped add-on folder directly to your WordPress site at /wp-content/plugins/.
Once your add-on is installed, you will need to activate it by entering your license key. This can be found in your Downloads section after logging into your account at wp-statistics.com. You can also manage your license and domains under the Subscriptions section.
To activate your license:
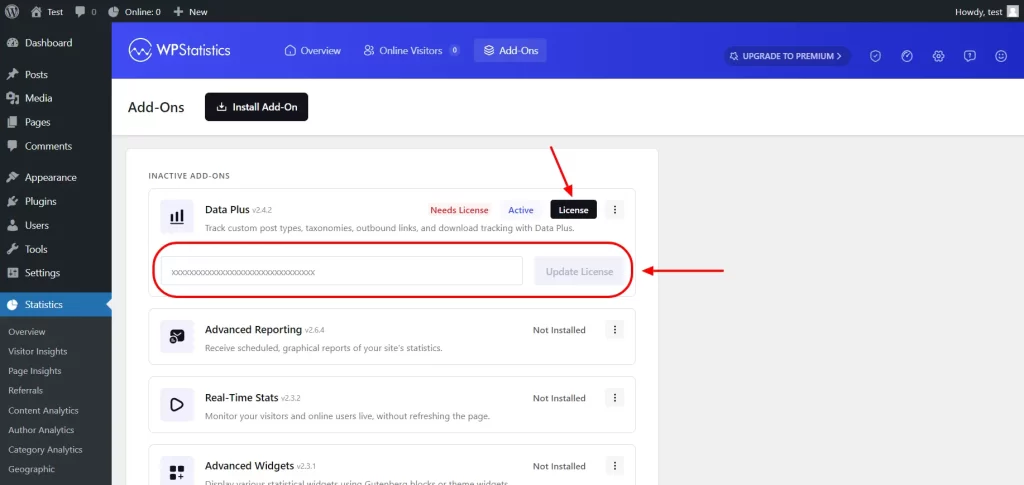
You should see a confirmation message once your license is successfully activated. If you experience any issues, don’t hesitate to contact our support team for assistance.
If you encounter any issues during the download or installation process, our support team is ready to help you troubleshoot and resolve any problems. Feel free to reach out via our support page.
Become part of our growing family of +600,000 users and get the tools you need to make smart choices for your website. Simple, powerful insights are just a click away.